I feel like I just climbed Everest. No, I haven’t been to the Himalayas, but my journey could have used an oxygen boost! I just finished my first king-size quilt. If you’ve ever folded up one of these puppies, you know just how big they are. But that didn’t stop me when I told Radar that I didn’t like any of the quilts out there, and they were too expensive, so I was going to make one myself. Pre-deployment me was so naive! But once I set my mind to it, there was no giving up! You can’t just take things off your deployment bucket list without trying!
I know I’m being a bit dramatic, but it really is a huge (pun intended) accomplishment. When I designed the quilt (tutorial to follow), it didn’t occur to me that a quilt made of 12-inch squares that’s 9 wide by 8 long is made of SEVENTY. TWO. SQUARES. Apparently I missed the multiplication day in engineering school. It took me about 3 months to complete (with other projects interspersed), but I’m so proud of the results!
Before I even bought anything, I wanted to have an idea of what my quilt would look like. I actually went through about 5 iterations, varying size, pattern, and order, before I came up with my design. Here’s my professional drawing of my final design:
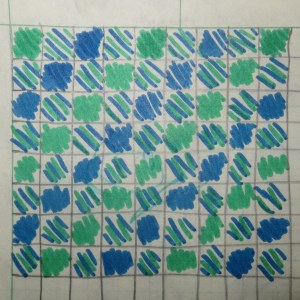
Fancy, huh? I went for alternating solid green and blue with a striped square.
I also wanted to use the quilt as you go method, like I used in the T-shirt quilt before. Because this is such a large project, getting it under the arm of my machine was not an option, and the cost of paying someone to long-arm quilt it was going to be over $200!
To make my design a reality, I needed the following supplies:
- 1 yard each of 5 green fabrics
- 1 yard each of 5 blue fabrics
- 7 yards of fabric for half of the backing, the pieces between the front squares, and the binding (the white background fabric for mine – we’ll call this fabric A)
- 5 yards of fabric for half of the backing and the pieces between the back squares (the navy background fabric for mine – we’ll call this fabric B)
- 8 yards iron-on batting
- Coordinating thread – at least 6 spools! (I used about 2 of green and 4 of blue)
Start out by washing your fabric! I’d hate to do all this work just to have it go wonky on the first wash. Then you’ll start cutting out your fabric – a lot of it!
- 36 12″x12″ squares of each of your 2 backing fabrics (total of 72, half fabric A and half B)
- 72 12″x12″ squares of batting – if you can’t make them all whole, it’s ok to piece 2 together when you attach to your backing
- Cut your green and blue fabrics into 2.5″ strips, parallel to the selvedge (keeps it from stretching and looking weird)
- For the front, cut the following from fabric A:
- 64 3″x12″ pieces
- 7 3″108″ pieces (sew them together if necessary)
- Press each of these pieces in half hot dog style, right sides out, so they are 1.5″ wide
- For the back, cut the following from fabric B
- 64 2″x12″ pieces
- 7 2″x108″ pieces (sew them together if necessary)
- For the binding, cut 3″-wide strips of fabric A; sew them together until you have about 450″ of length (it’s too much, but it’s better to have excess than not enough!). Also press this long piece in half, right sides out, so it’s 1.5″ wide.
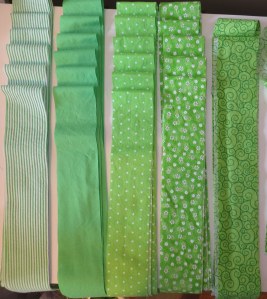
My green strips… I didn’t take a photo of all my cut fabric!
Now that your cutting hand is blistered, it’s time to iron the batting onto the backing. Follow the instructions on the batting you purchased to attach the 72 pieces of batting to the 72 pieces of backing (wrong side of fabric to glue, obviously).
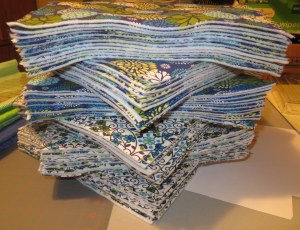
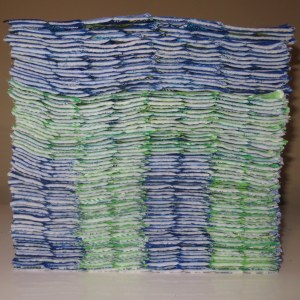
That’s what 72 pieces of backing + batting looks like!
And finally, after all that prep work, we can start sewing! For something as large as a king size quilt, I recommend using a sort of production line system – especially with the blue and green striped squares, since your quilting thread will alternate colors with the strips. Each square followed the same basic pattern:
Line up a strip of fabric, good side up, along the diagonal of the square, 1/4″ past center (for seam allowance). Lay a second strip of fabric right side down right on top of it, and stitch along the diagonal of the square. Fold the fabric back to show the good side, and stitch 1″ from the seam. If the strip was too long, trim it to line up with the edge of the square.
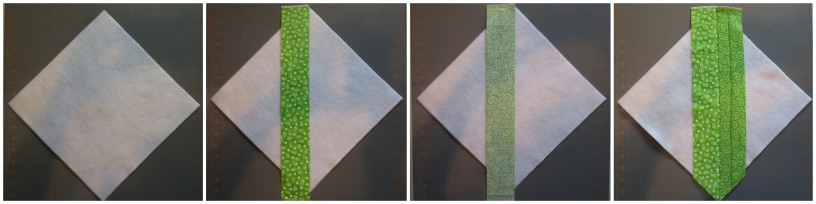
1. Square, batting side up. 2. Green strip, good side up, 1/4″ to the right of the diagonal of the square. 3. Second green strip, good side down, right on top of the first. 4. Opened up and stitched down; don’t forget to add that stitch 1″ from the seam on the left strip.
Repeat until the square is covered.
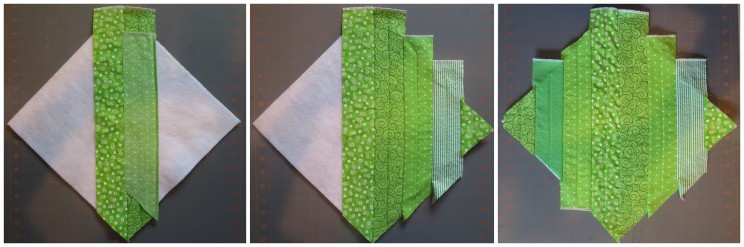
Left: Adding the third strip. Center: One side complete. Right: Whole square complete.
Then, trim the edges, and you’ve completed one square!
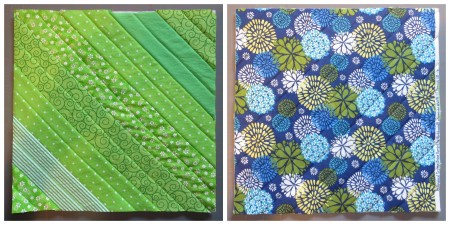
Front and back of your completed quilt block! The lines are simple, yet beautiful and functional.
Repeat another 71 times 😛 Pay attention to what fabric you have on the back; to get a checkerboard look on the back of my quilt, I used fabric A on the back of the solid colored blocks, and fabric B on the back of the striped blocks.
72 completed quilt blocks – whew!
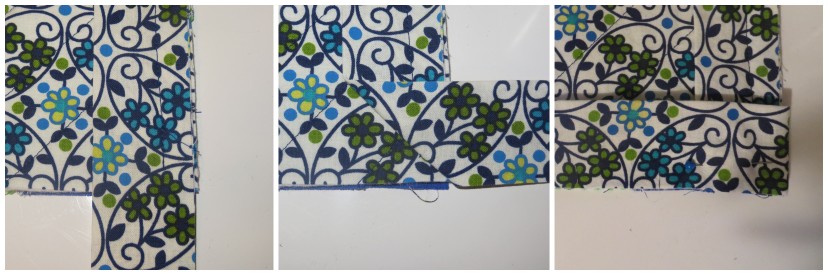
Now it’s time to put it all together. I’ll start off by noting that in this quilt, the direction of the stripe matters, so make sure they’re all oriented the way you want as you assemble them! You’ll get the blocks ready to put together by first putting aside the blocks that are on the right edge of the quilt (in my case, from the drawing above, that was 2 green, 2 blue, and 4 striped). You’re going to attach strips to the front and back of the right side for each of the remaining blocks. Layer the pieces as follows: 2″x12″ strip of fabric B (good side up), right side of quilt block (front side up), and folded 1.5″x12″ piece of fabric A, raw edges lined up with right side of quilt block. Stitch in place with a 1/2″ seam allowance. Precision is your friend here! That 1/2″ will be incredibly important later. Repeat for all the blocks (except the ones put aside).
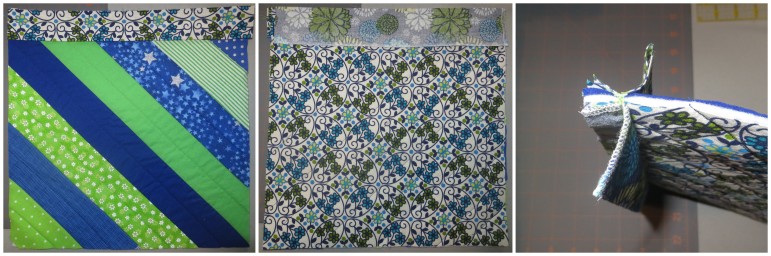
Left: Front of block with strips attached. Center: Back of block with strips attached. Right: Side view of strips.
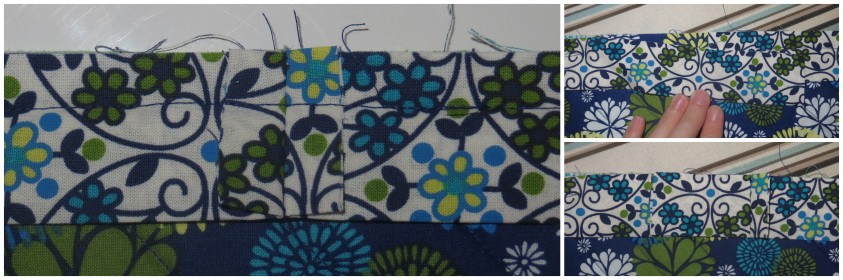
Now it’s time to start putting together the strips of blocks. Take your very first (top left) block and the one to the right of it – this is where a good diagram comes in handy! You’re going to attach the strip on the back of the left block to the left side of the right block (confused yet?). Lay the right block back side up, and, keeping the left block front side up, lay the back strip so it lines up with the left side of the right quilt block. Stitch in place with a precise 1/2″ seam allowance. See the photos below for what I mean! It sounds complicated but it’s really not. Then lay the two blocks flat, and you’ll see on the front side you have a flap that will fold over to cover the raw edges. Pull it over and sew right on the edge of the pressed fold, being sure to cover the seam. This is where the 1/2″ seam allowances were important – for it to cover and fit properly, you needed to have the right seams allowances. Otherwise the pieces will have a gap, or they’ll overlap and be bulky. They should meet evenly.
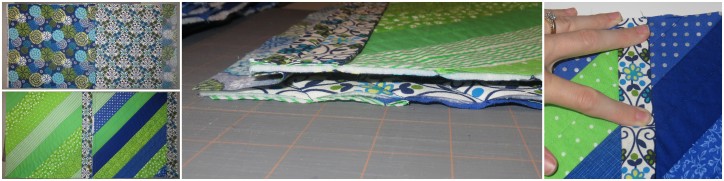
Left Top/Bottom: Front and back of 2 blocks attached. Center: How to line up the squares. Right: Attaching the front flap to cover the seam below.
Repeat with each successive block to the right, including the last column that was set aside before. The do the same thing for each of the rows of the quilt. At this point, I safety-pinned papers with the row numbers so I could keep them in order and save my sanity!
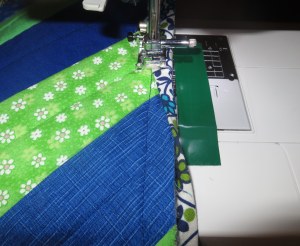
You’re going to then follow the same principle to attach the rows to one another, using the 108″ long 3″ (folded and pressed to 1.5″) and 2″ pieces. And, honestly, this is where it starts to get tricky. Once you’re about halfway through combining the rows, the quilt starts to get a little unwieldy – and heavy! I actually moved furniture in my craft room to make it a little easier, and I would only attach one row at a time to give my muscles a break. But take heart – you’re almost done! Also, try to make the vertical connections line up, or your rows will look funny (think about the columns looking straight).
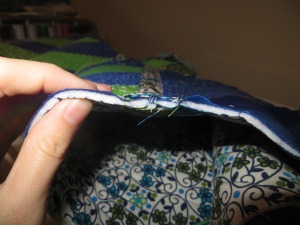
This is where the 1/2″ seam allowance shows – the batting should meet perfectly, not gap or overlap.
The final step is binding the quilt. Take the ridiculously long 3″ wide piece (folded to 1.5″ wide), and start pinning it to the back of the quilt, raw edges lined up with the edge of the quilt (start somewhere in the middle of a side, not at a corner). Don’t pin it all the way around, just enough to get you started. Then, start stitching about 4″ from the end of the binding (with our best friend, the 1/2″ seam allowance) to attach it to the quilt. Stop sewing and backstitch 1/2″ from the edge when you get to a corner. Then fold the binding at a 90 degree angle from the direction it was going, and fold it down to align the raw edge with the next side of the quilt. Start sewing on the new side of the quilt 1/2″ from the edge (same 1/2″ seam allowance, and backstitch at the start). Continue around until you’ve done all 4 sides, but stop at least 4″ from the start of the binding where you began.
Making the mitered corner – 3 steps
Trim the extra binding so there’s an inch or two extra, and press the two binding ends back so they meet at the fold. Then sew them together along that fold, trim the excess, and finish attaching the binding to the back of the quilt.
Left: Final product for binding ends. Right Top: Leave the tails loose. Right Bottom: Press and stitch the ends, then trim.
Last step! Just like you did on the front, pull the folded edge around the quilt and stitch it in place to hide the seam from attaching it to the back. At the corner, tuck the excess in to get a mitered look.
Finishing the binding on the front, and my dirty little secret for maintaining a precise 1/2″ seam allowance!
And voila! You have completed a king sized quilt!! It’s sort of a big project, but you’ll be so cozy under a quilt you made yourself – way more comfortable than anything you could buy at the store!
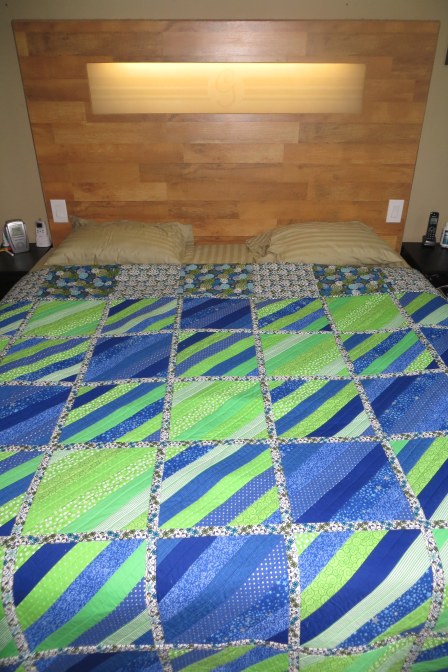
It’s a thing of beauty! I folded the top down to show off the back pattern, too.
If you like our custom-made king size bed, Radar actually made an instructable for it! It has a built-in light with two-way switches, hidden drawers for storage, and even power outlets for each person (because we get sick of fighting over power outlets in every house we move to). It’s a pretty sweet bed, you should check it out (end shameless plug).
I hope this tutorial has given you the confidence to make your own king sized (or even queen or twin) quilt! It’s a lot of work, but so nice to have a custom piece to keep you cozy at night! Stay tuned for tutorials for matching accessories for the bedroom from extra fabric I bought!